|
Cast
Shadow
|
|
|
When you see an object in a spotlight or a setting sun, you will notice the long shadows that are created behind them, this technique will teach you how to add realism to your images. Download the PSD file here. |
|
| By Colin Smith www.photoshopcafe.com |
 |
|
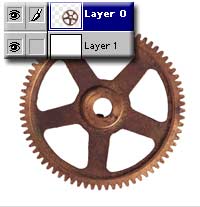 |
Open your image and remove it from the background.
|
 |
|
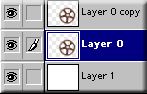 |
Duplicate the layer by dragging tot the new layer icon in
the layers palette. |
 |
|
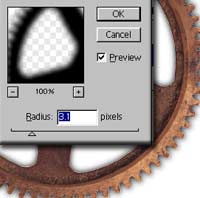 |
Make sure the foreground color is set to black Now fill the new layer by pressing Ctrl+Shift+Delete Mac:Cmd+Shift+Del (The shift key will make it only fill where there are pixels aka preserve transparancy) Filter>Blur>Gaussian blur, amount of 3-5 |
 |
|
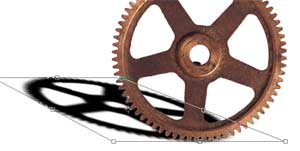 |
Now to distort the shape. (If you are going to do this to text, you must render the type first) Press Ctrl/Cmd+T, this will bring up the free transform tool. Right click on the selected object Mac:Cmd click. Select "Distort" from the pop-up menu. You will see a bounding box with 8 little squares, click and drag the top left and top right squares (called handles) until it looks similar to the picture on the left. Press Enter/Return to apply the transformation. |
 |
|
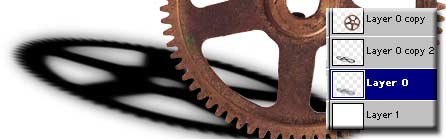 |
Duplicate the shadow layer. Drag to the Apply the gausian blur again, this time add a larger setting 5-10 |
 |
|
 |
We now want to make the shadow softer as it gets further away.
Using the gradient tool drag it from right to left to blend the 2 shadow layers. |
 |
|
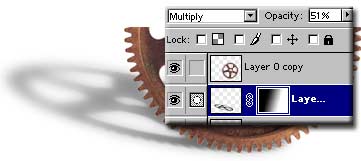 |
Finally Set the shadow to multiply mode and the opacity of the top shadow layer to about 50% and the bottom shadow to about 30% Experiment and see what looks best for your image. |
![]()
 What
do you do when a drop shadow isn't realistic enough? Create a cast shadow.
What
do you do when a drop shadow isn't realistic enough? Create a cast shadow.
